Pike Baked Moscow style

June 21st, 2009

This Central European classic dish is complements of my Mom & Dad, as they actually go fishing for pike, which is a vicious and strong fish with a torpedo-like shape and big, sharp teeth. It is fairly hard to fish, as it tends to fight as you try to get it ashore. I remember years ago my grandfather telling me that catching a pike is tricky and you gotta ‘tire’ it for hours in water before you get it out. Here in the United States it can be found in the Great Lakes and other larger lakes. However, I strongly suspect that in your case, a trip to a fishmonger or a grocery store would do.

If you can’t find pike, you can try substituting it with catfish or other flaky, low-fat, lean-meat white fish.

This dish itself embodies central European approach to making food  – simplicity of ingredients and preparation methods, including the sour-cream sauce, widely used for cooking throughout eastern and Central Europe.

Ingredients:

4-5 pike fillets

4-5 potatoes cut into ½ inch round slices

1 large onion thinly sliced

white mushrooms –  around ½ pound

¼ cup chicken or vegetable broth

6 ounces sour cream

bay leaf

salt & pepper, nutmeg

white wine

The Prep:

1. Cut potatoes into ½ inch slices and fry in olive oil or butter for about 10 minutes until half-done.

2. Sauté onions for a few minutes until translucent in a heavy sauté pan, then add mushrooms and cook together until mushrooms turn golden brown. Set aside.

Sour Cream Sauce:

Mix ¼ cup of any stock (vegetable or chicken broth) with 6 ounces of sour cream and simmer it until it gets thicker.  Add nutmeg, bay leaf, pepper and pour a splash of dry white wine into the sauce.

The Fish:

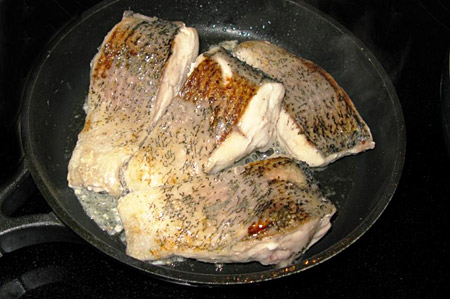
An average-sized pike (5-6 pounds) should be cut into filleted pieces.  Add salt and pepper, then fry the fish in vegetable oil until it gets a brown gold crust.  Put the fish in the center of the baking pan (you can use ceramic or earthenware) and surround it with slightly fried potatoes cut in circular slices. Cover the fish with fried mushrooms and onions, and then drown the stuff with sour cream sauce with nutmeg.  Bake the fish in the oven for 25 minute at 375-400 decrees.

Share

Trumpet Mushroom & Truffle Oil Risotto

May 4th, 2009

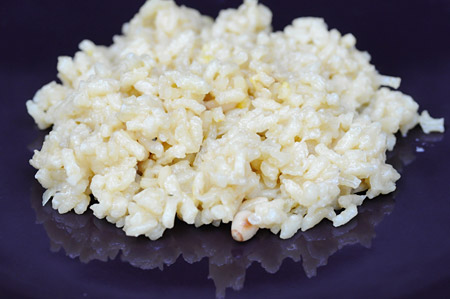
Recently I have been experimenting a lot with Risotto. From trying different stocks / fumes (which are always the soul of your risotto) to playing around with various combinations such as basil, sun dried tomato & pine nuts, or fennel, saffron & mushroom, or perhaps shrimp stock, chilly and sun dried tomato, my personal discovery is this: less is more. My recent favorite is a simple risotto with finely diced sautéed fennel root, butter and pine nuts. Sometimes I top it with a few dashes of truffle oil or Trumpet mushrooms sautéed in butter. Risotto is one of the dishes that definitely benefits from butter. Whereas I still use it sparingly I usually add around 1-2 teaspoons for the proportions below.

Risotto

Risotto


1 ½ cup of Arborio Rice
4 cups of vegetable or chicken stock or shrimp fume, or water or mushroom infused liquid *
1 cup of cheap light white wine (Sauvignon Blanc, Chardonnay, etc)
¼ cup of toasted pine nuts
1 cup of diced fennel root
1/3 cup of Parmesan cheese
Trumpet Mushrooms
Butter, Salt, Olive Oil, Truffle oil (optional)


Methods: Sauté, Simmer, Fry
Cookware: Heavy Stainless Steel or Copper Sauté Pan.

Preheat a large Sauté Pan, Rondeau or a cast iron braiser pan. Sauté fennel on medium heat in butter and oil for around 5 minutes, adding a pinch of salt, making sure fennel is translucent and tender but not browned. Add a bit more butter and stir in rice. Coat rice in butter and sauté, stirring constantly, until rice turns translucent and absorbs the fat. This process should take 2-3 minutes or so. Make sure not to brown or burn the rice. Slowly add the wine and keep stirring risotto until wine is almost completely absorbed.

The trick with making risotto is to never let the pan get quite dry and never drown the rice in liquid. Start slowly adding warmed up stock a ladleful at a time to your risotto, stirring constantly, making sure (whatever you do – please make sure of that!!!) that you do not let the liquid dry out completely. Your rice should always be covered with a little liquid. Keep repeating these steps, stirring constantly and watching risotto until all stock is absorbed. (25-30 minutes, depending on choice of cookware) Right before the stock is all absorbed, preheat a copper or cast iron skillet to med-high heat.


Slice a few trumpet mushroom in half and slice some more in thinner 1 ½ – 2 inch slices. Sprinkle with salt and sauté in butter and oil, turning the large mushrooms only once on the side, thus browning them well. Meanwhile finish risotto, by adding a little bit more butter and Parmesan cheese. Let the butter melt, stir in all the cheese and make sure all liquid is “almost all” absorbed. I always leave a little liquid in and take risotto off heat – it will absorb completely in the next 5-10 minutes as it stands. Finish the mushrooms, making sure they are golden brown on both sides. Stir in the thinner mushroom into risotto, and add the thicker pieces on the top, to garnish the dish. Stir in freshly toasted pine nuts. This is the time to add a few drops of truffle oil. I recommend you taste your risotto as is prior to doing it, as you might not like the strong flavor of truffles.


In any case, if you choose to use truffle oil, add just a dash and maybe only to half of risotto. You should serve it immediately, don’t let it wait too long.

Tips & Tricks:

I use, and only suggest using, heavy cookware made of cast iron, copper or tri/ 5 ply steel. (sauté pan is my choice, although I also use a enamel coated cast iron rondeau – shallow sides, wide shape)


Non-stick pans are bullshit: they are too light, burn your food and are not healthy for you. If you use something that is too thin and light, odds are it will burn your risotto or your liquid will evaporate too quickly, leaving risotto too al-dente (not fully cooked, in plain English)


If you let your pan get dry the starch of rice will burn, causing it to get clumpy and sticky.
If you drown the pan in liquid, rice will get mushy. You gotta keep the perfect balance, always adding liquid slowly, warm and never letting the rice dry out completely.


Stock is important – care to make your own, homemade, good tasting stock. Store bought stocks are usually an over-salted, dried out cubes or sodium-ridden powders not worth cooking with. I don’t salt stock when I make it.

Salting rice is important – it does something to make it taste better.  I usually add around a teaspoon for the proportions above.


* Take dried mushrooms (porcini, etc, be careful with shittake as they are highly flavorful) pour a cup of hot water over them and let stand for an hour. Use water as part of stock.

Share

My Tomato Sauce

April 6th, 2009

I’ve got a bunch of my friends asking me how come my tomato sauce tastes so rich and has such a rich deep flavor. I am going to go over a few tricks here, but put it short and sweet: I do not put too much stuff in my tomato sauce, and I stew it for hours. Ok, I hear people talk about how they cook tomato sauce (that is sauce for pasta, gnocchi, pork) and I get scared. I mean sometimes there is a list of ingredients that tops a vegetable isle in Whole Foods! It’s tomato sauce. Period. Not tomato and pepper sauce, not tomato, pepper, onion, sausage and whatever else sauce. Not to say there is something wrong with those sauces – they are just not a TOMATO sauce!


My most important tricks to making a rich, thick and flavorful tomato sauce that is as old-world Italian as it gets are very simple:


1. Superb Tomatoes, like San Marzano, or other good Italian brand plum tomatoes in their own juice, unsalted, nothing else added to them. Please check to see that there is nothing added: stores these days love adding all kinds of shit to canned food.


2. Few other ingredients / spices. I actually make different combination practically every time I cook my sauce, but here is my classic recipe.

My Tomato Sauce

My Tomato Sauce


Ingredients:

San Marzano tomatoes (1 large can)

Fresh basil leaves (8-10) or a tsp of dried basil, or tsp of dried oregano, or both.

A decent amount of olive oil (2-3 tablespoons)

1 tsp salt + 2 tsp of sugar (adjust that to your own taste)

2 tsp of tomato paste dissolved in ½ cup of water

¼ cup of red wine

(If, and only if I want to make it spicy for shrimp and other seafood dishes, I will add 1 – 2 dried chilies)

3. Process tomatoes using a food processor. Do not dice, cut, chop, whip or blend your tomatoes. Just use a good old-fashioned food mill!

4. Stew it for around 6 hours on low heat.

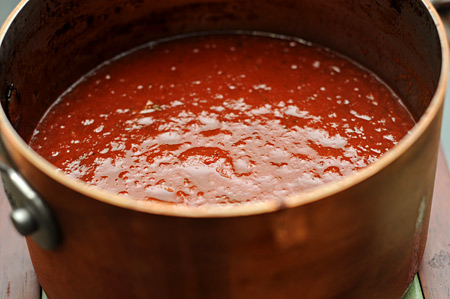
5. Use the right saucepan. I use 2.5 mm thick copper 2.5 qt saucepan – there’s something about copper pots – they just make sauces creamier. Cast iron saucepan, like Le Creuset will do quite well also, along with maybe a very heavy-duty stainless steel pot. DO NOT use light cookware to make this: it will most likely burn the sauce.

Process:

I heat the oil first, making sure it’s hot but not smoking. If I choose to use a chilly I will add it now and leave it for a few minutes on lower heat to infuse the oil. If not, I will add processed tomatoes and bring them to a light simmer, add basil /oregano, salt and sugar. Add tomato paste & wine, close the lid with a slight crack to it to allow some evaporation and stew for 5-6 hours, stirring at hour intervals or so.

This sauce is great on:

Pasta, gnocchi, polenta, toasted baguette, pork or chicken.

Share

Hummus

March 13th, 2009

Let me start by saying that most hummus found in conventional stores tastes dreadful and has very little to do with the original hummus you can taste in the Middle East.  Store bought hummus is usually improperly mixed, overloaded with an unnecessary bunch of cliché ingredients (like garlic and peppers, everything but good chick peas) and costs 3-4 times more than if you were to make it yourself.

I lived 3 years in the Middle East and tried hummus everywhere from Palestine to Jordan to Israel and it has nothing to do with the crap you get in conventional stores. In fact, the only good commercially sold hummus I know of is made by a company called “Sabra.” Usually you can find it in your local Middle Eastern market. Not strangely so, it’s the same brand they sell all over Middle East.

Hummus is a spectacularly easy dish to make and takes just a few minutes – all you have to do is mix some stuff up and “dress” it later for serving.
Why is it called “hummus”? – It means garbanzo beans in Arabic and other languages, and as you’ll see from the recipe, Garbanzo beans (also known as chick peas) is THE main ingredient in Hummus!

Hummus

Hummus


Equipment: Blender or Food Processor (food processor is better)

Ingredients:

1 can  (about 1 ½ cup) of cooked garbanzo beans (chick peas)
1 ½ large tablespoon of Tahini (sesame paste)
Juice of ½ lemon
1 tsp of salt
Olive oil (1-2 tbsp)

In food processor or blender process garbanzos with a little bit of water added. Add water slowly to best control desired consistency. It’s your choice to make it creamier or chunkier – both are great. Add tahini and mix well. Add salt and lemon juice and olive oil. Mix. Taste and adjust salt and lemon juice to personal taste. Keep in mind that it will taste stronger (better!) after hummus stands for a few hours in the fridge. Serve with pita brad or pita chips.

Making Tahini Sauce: (optional, for dressing)

Take a tablespoon of tahini and slowly keep adding and mixing in milk or cream until a thin sauce is formed. You want to make sure the sauce slides off spoon, but is not too runny. Add a pinch of salt. Mix. Add on top of hummus when serving.

Dressing a bowl of hummus:

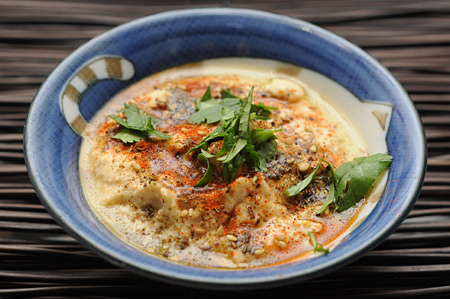
Take a bowl put some hummus in it and a bit of olive oil along the edges of the bowl. Take a spoon and spiral it down the down from outer to inner edge – that should spread oil equally. Put any of choice, or any of your own on top:

Here are my favorite combinations:

Paprika & Zatar (Jordanian Thyme Mix)
Tahini Sauce & chopped parsley
Toasted pine nuts and paprika or parsley
Diced black olives & olive oil
Roasted garlic
Garbanzo or fava beans
Raw egg & salt (if you are an adventurous type)

Tips & Tricks

Home cooked garbanzos usually give a better result, but the whole point is that you can make this dish in 5 minutes, so I usually end up using canned beans as instead. However, quality garbanzos make substantially better hummus – I buy mine in a Middle Eastern market, where I also but Zatar (mentioned above) and Tahini.

The amount of water will have to be more if using a blender. Ideally hummus should be well processed, with no large chunks in it.

Buy Tahini in your local Middle Eastern or Persian market –- they will rip you off in Whole Foods and tahini will never taste as good as “from the source.” It should cost around $3 – $5 per medium sized jar.

Personal trick – never add anything more than mentioned here to hummus while making it – always add it after the hummus is done, during the “dressing” stage. Why? There are hundreds of things you can add to hummus quickly and easily and thus you can have a great variety of flavors available from one batch if you stick with the basic recipe and enhance portions of the batch later on with other ingredients. (some examples are above under “favorite combinations”)  I usually make hummus a day or at least a few hours in advance. It tastes better if it “sits” in the fridge for a bit.

Share

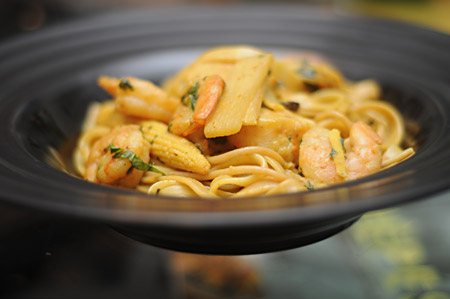
Spicy Thai Seafood

March 1st, 2009

There are so many ways of making this type of dish – it can be a blog entry every day for many months. From what type of starch to use to how to marinate your seafood, there are so many great choices and the cool part is – none of them would be wrong!


Important things to understand about this dish are: it’s a spicy dish – it needs chilies! It’s a flavorful dish. It will need basil, ginger, galangal and lemongrass – all of which are flavorings associated with Thai food. It MUST have fresh seafood! Fresh seafood is the key – always buy the best seafood you can find. I get mine in Whole Foods or my local Chinese market. I do not recommend buying seafood in standard supermarkets – no matter what tricks you use it is still frozen, cheap seafood. Your dish will need rice or pasta and a few nice vegetable selections: I use baby corns, bamboo shoots or water chestnuts.

Spicy Thai Seafood

Spicy Thai Seafood

Ingredients:

Shrimp ½ -1 lb

Scallops ½ – 1 pound

Calamari (cut into rings)

Ginger (1 large clove)

Red Thai Chillie peppers (crushed, or fresh, or whole) a teaspoon, or 4-5 small pieces, or 1 fresh pepper

6-8 basil leaves

Soy sauce (2 table spoons)

Coconut Milk ½ can

Sesame oil – 1 tsp

Turmeric ½ tsp

Method: Pan fry, sauté

Cookware: Wok or Saute Pan

Cook linguini pasta or rice in advance, as directed on the package. If cooking linguini, (which is what I do) cook it 5 minutes in advance.

Combine seafood in a colander, peel shrimp, pour a ½ cup of salt on seafood and run cold water over seafood for 10-20 minutes. Make sure to wash all salt out. This method gets rid of all impurities in seafood – a cleaning method. Wash out carefully and pat dry. Mix ginger, chillie flakes, basil, turmeric paste (see tips & tricks below), soy sauce and sesame oil. Whisk in and add seafood to it. Marinate for 30 minutes or more.

Heat oil in a wok or a large sauté pan, lift up seafood from marinade with a slotted spoon and brown your seafood on very high heat, just until well browned. Add your choice of vegetables at the same time. Add marinade and coconut milk and steep for a minute or two and take off heat. Pour over seafood and serve immediately.

Tips & Tricks:

I do use pasta, not rice noodles. Why? Linguini works best for me. It just gives the right taste and texture. My second choice is brown rice or a mixture of brown and wild rice.

Salt out you seafood for at least 10 –20 minutes: it’s the key to making great seafood. Not only does it make seafood taste better, but the texture improves as well. It’s an ancient Chinese method. You might as well use it. I do, and it works.

My personal trick is this: I find there is a difference in how you make your curry. I take basil leaves, turmeric, chilies and ginger and using pestle and mortar create a paste or curry that will be the base for this dish. Its different from using a grinder, blender, chopping etc – you gotta use pestle and mortar.

Flash fry seafood first in hot oil and brown, then add sauce and lower heat to steep seafood in your marinate. I brown scallops first, and then add shrimp & squid. I find that scallops need to cook a few minutes longer. Good luck – this dish is really good when its got a kick to it – have fun with that chilly!

Share

Tales from the (EU) Trip: Interview with Wolfgand Hartl, chef of St. Georg Hotel restaurant.

February 8th, 2009

After a few days of hanging out and enjoying sightseeing, great beers and fantastic Bavarian food in Munich, Germany, we drove a few hours to Austria’s Gastein valley to the small ski town of Bad Hofgastein, about 30 miles away from Saltzburg. We were staying in a beautiful 4 star hotel, the St.Georg, with a hospitable and extremely creative restaurant run by the Hartl family. I could tell the food was going to be great from my first bite of fresh baked, hot bread with butter while waiting for my wine (Austrian Zweigelt!) and main course to show up. After my dinner, I asked if the chef would be kind enough to answer a few questions and chat about Austrian food with me for this blog post. And… the chef agreed!!!

Wolfgang Hartl has been working as a chef in his father’s restaurant for over 11 years now; and runs, together with his father, a small but very inventive kitchen staffed with 6 cooks and a few helpers. Prior to joining his father’s venture, he worked in a 5 star restaurant in Tirol, Austria as a chef patissor (pastry-chef) and other restaurants in Europe, as well as a private residence in Santa Monica, California.

Wolfgang Hartl

Wolfgang Hartl

He has a solid knowledge of Austrian cuisine and loves cooking all kinds of foods – Italian, Mediterranean, classic European, amazing seafood dishes and even sushi – all of which ended up being an appetizer buffet on our second day! The large buffer table was full of sushi trays, shrimp and seafood in oil and herbs, fantastic langoustine (cray) fish tails with fresh herbs, tuna carpaccio, smoked salmon, and zucchini and round red peppers stuffed with cheese . I must admit – I was full after the appetizer course! The international, all organic meats and vegetables menu in St. Georg restaurant is very creative and is rotated every day by Wolfgang and his father. Wolfgang believes that trying new things and creativity is vital to cooking – he creates various dishes, rooted in an array of cultures and from various ingredients, improvising and discovering new twists every day.

One of the reasons I wanted to talk to the chef was to find out more about Austrian food.

Wolfgang describes Austrian food as quite heavy, using a lot of pork, potatoes, breadcrumbs and cream sauces – much alike to German food. When asked to name a few traditional dishes that are not a cliché schnitzel and noodles or well-known apple strudel, Wolfgang mentioned “Jafelstuk” – a meal of boiled meat, potatoes and creamed spinach, and “Kaiserschmarrn” – a baked layered desert with plums. I asked Wolfgang to think of a soup that is very typical to Austria, (as soups are one of my favorite things to cook) and he mentioned “Fritattensuppe” – a simple consommé with crepe-like pancakes cut on top of it.

When asked what kind of food does he love to eat, Wolfgang mentioned seafood with pasta, lobster and sushi. He loves simple home-style restaurants where the culture and traditions of food are authentic and represent real people.

Here is a traditional recipe Wolfgang shared with me for this entry:

Kaiserschmarrn with Zwetschgenroster (plum sauce)
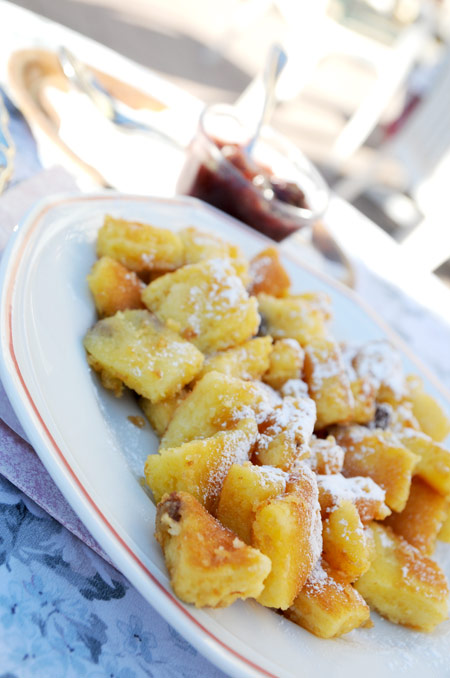
Kaiserschmarrn - Austrian pancake desert with plum sauce

Kaiserschmarrn - Austrian pancake desert with plum sauce

Zwetschgenroster (plum sauce) Kaiserschmarrn

2 lb of plums 1/3 lb flour

¼ lb sugar 4 egg yolks

4 tbsp Austrian rum 2 tbsp butter

½ vanilla pod 5 tbsp milk

½ stick cinnamon 4 egg whites

handful of raisins

2 tbsp Austrian rum

Sugar & butter for caramelizing

Kaiserschmarrn:

Mix flour and egg yolks until smooth, add melted butter and milk. Whip egg whites and sugar until stiff and fold (like souffle) into the batter mixture.


Step 1: Pour creamy mixture to a depth of 1 and ¼ inch into a very hot fry pan, place briefly on a stove, and then bake in the oven for around 4-5 minutes on 425 degrees. Kaiserschmarrn rises better this way.

Step 2: Halve the Kaiserschmarrn, turn and place onto stovetop once more. Keep adding butter and sugar so that it does not stick and a caramel sugar crust forms.


Step 3: When golden brown on both sides, cut the Kaiserschmarrn into squares, add raisins in rum and keep adding butter and sugar as in Step 2.

Decorate with connectionist sugar.

Zwetschgenroster:

Wash, halve and stone the plums. Add the remaining ingredients and spices and stew over a very low heat until the sauce is formed.

Tips: Add a few tablespoons of schnapps to the sauce before serving to round off the flavor.

Share